“ESP32 Cam: Where Vision Meets Possibility, Every Pixel Tells a Tale.”
Table of Contents
Discovering the ESP32 Cam: Your Gateway to Fun and Innovation
Are you curious about gadgets and technology? Do you want to explore the world of cameras and computers in a fun and easy way? If so, then you’re in for a treat! Let’s take a journey into the exciting realm of the ESP32 Cam – a tiny but powerful device that opens up a world of possibilities for creative minds like yours.
What is the ESP32 Cam board?
Imagine a small chip, not much bigger than your fingertip, that can see and understand the world around it. That’s exactly what the ESP32 Cam is! It’s like a tiny computer with a built-in camera. This magical little device is made by a company called Esp resift Systems, and it’s designed to help people like you create all sorts of cool projects.
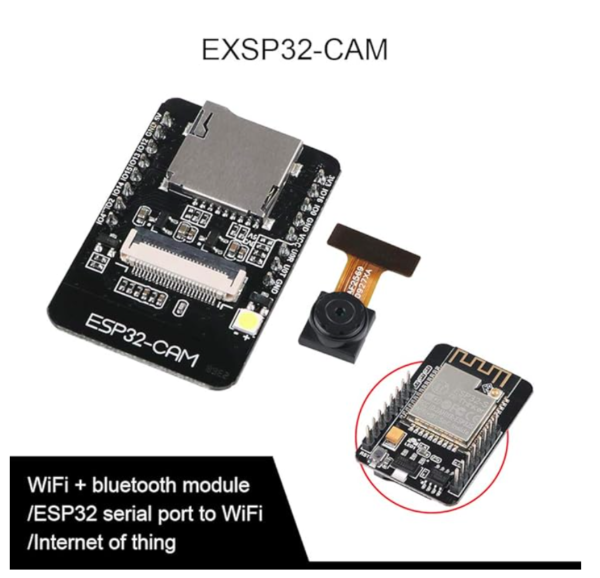
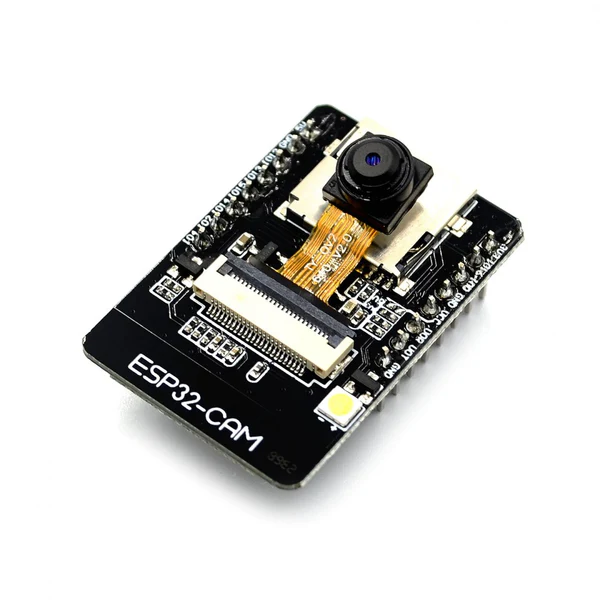
At its core, the ESP32 Cam is a compact module that integrates an ESP32 chip and a camera, enabling developers to capture images, stream video, and perform various image processing tasks. Developed by Espressif Systems, the ESP32 Cam combines the power of the ESP32 microcontroller with the flexibility of a camera module, opening up a myriad of possibilities for projects ranging from surveillance systems to home automation and beyond.
What is ESP32 Cam Camera?
What Can You Do with the ESP-32 Cam?
Now, you might be wondering, “What can I do with a tiny computer and a camera?” Well, the possibilities are endless! Here are just a few ideas to get your creative juices flowing:
Take Photos and Videos:
With the ESP32 Cam, you can take pictures and record videos just like you do with your smartphone. You can capture beautiful moments, document your adventures, or even make your own mini-movies!
Build a Spy Camera:
Ever dreamed of being a secret agent? With the ESP32 Cam, you can build your very own spy camera! Hide it in a sneaky spot, like behind a plant or inside a toy, and use it to keep an eye on things without anyone knowing.
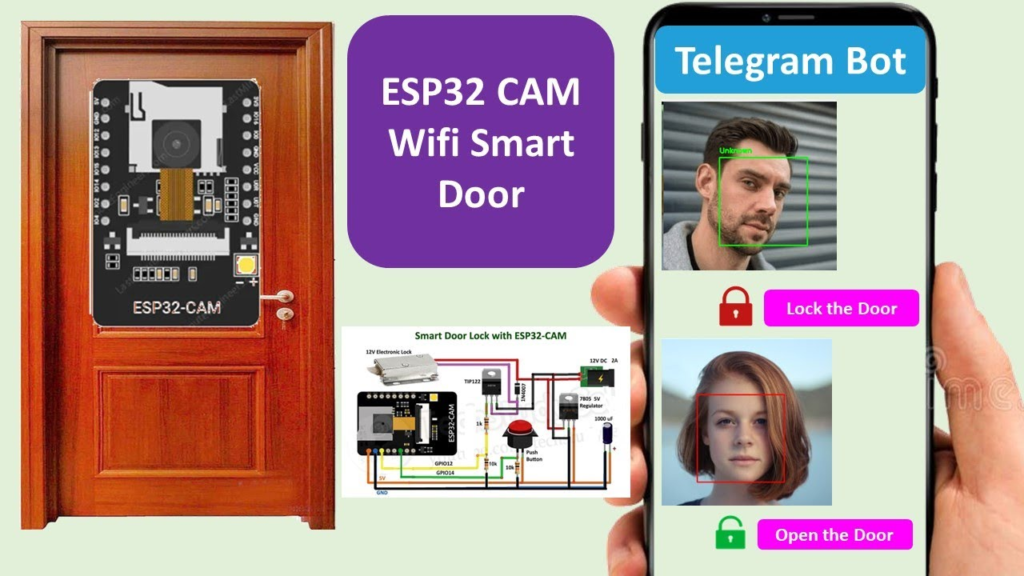
Create a Smart Doorbell:
Tired of missing deliveries because you didn’t hear the doorbell? With the ESP-32 Cam, you can build a smart doorbell that sends you a notification on your phone whenever someone rings the bell. You can even see who’s at the door using the camera!
Make a Robot that Sees:
Want to build a robot that can navigate its way around your house without bumping into things? With the ESP32 Cam, you can give your robot eyes so it can see where it’s going and avoid obstacles.
Build a Wildlife Camera:
Do you love animals and want to see what goes on in your backyard when you’re not looking? Use the ESP-32 Cam to build a wildlife camera and capture photos of birds, squirrels, and other critters that visit your garden.
How Does ESP32-cam Work?
Now, you might be thinking, “That all sounds great, but how does the ESP-32 Cam actually work?” Well, it’s pretty simple, really! The ESP-32 Cam has a tiny computer chip inside it called the ESP32. This chip is like the brain of the device – it controls everything.
The ESP32 chip is connected to a camera sensor, which is like the eyes of the device. The camera sensor captures images and sends them to the ESP-32 chip, which can then process the images and do all sorts of cool stuff with them, like recognizing objects, detecting motion, or adding special effects.
Features and Specifications
One of the key features of the ESP-32 Cam is its compact form factor, making it ideal for embedded applications where space is limited. Despite its small size, the module boasts impressive specifications, including:
- A powerful ESP32-S chip with Wi-Fi and Bluetooth connectivity, allowing for seamless integration with other devices and networks.
- A OV2640 camera sensor capable of capturing high-resolution images (up to 2 megapixels) and video (up to 1080p at 10fps).
- Support for microSD card storage, enabling the recording and storage of images and video locally.
- GPIO pins for interfacing with external sensors, actuators, and peripherals, expanding the module’s capabilities and versatility.
Getting Started with the ESP32 Cam
Ready to start exploring the world of the ESP-32 Cam? Here’s how to get started:
Get Your Hands on an ESP32 Cam:
You can buy an ESP-32 Cam online from electronics stores or hobbyist shops. It usually comes as a small module that you can easily connect to a computer or a microcontroller board.
Learn Some Basic Coding:
To make the most of your ESP-32 Cam, it helps to know a little bit about coding. Don’t worry if you’ve never coded before – there are plenty of beginner-friendly tutorials and resources available online to help you get started, like Arduino IDE
Start Experimenting:
Once you’ve got your ESP-32 Cam and you’ve learned some basic coding skills, it’s time to start experimenting! Try taking some photos, recording some videos, or building one of the projects we mentioned earlier. Don’t be afraid to get creative and try out new ideas – that’s what it’s all about!
ESP32 Cam Pinout
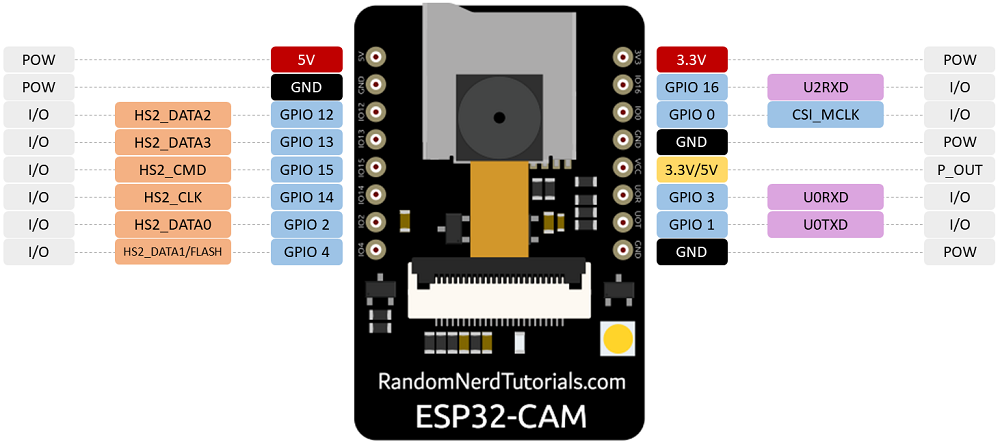
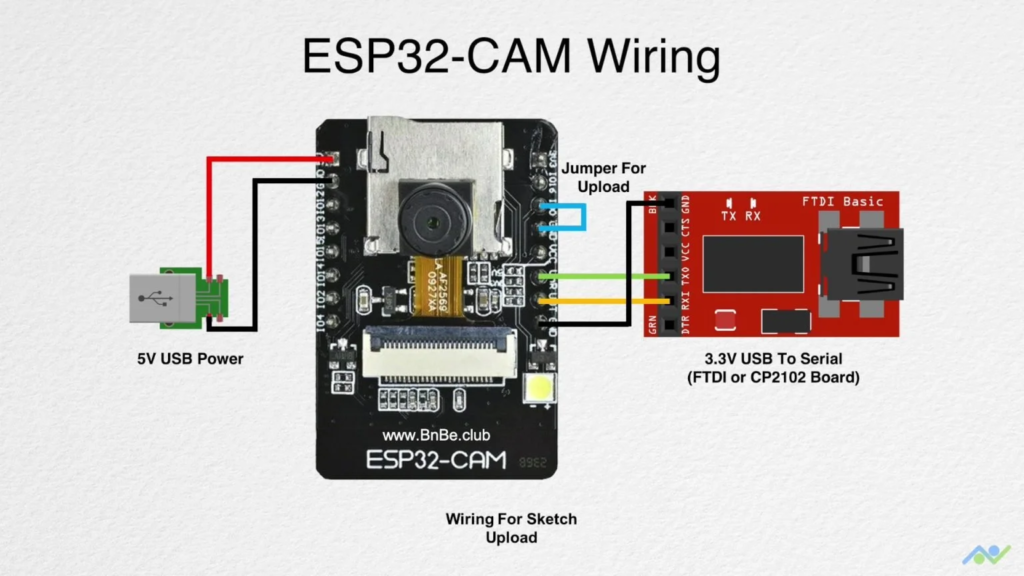
ESP32-Cam Wiring
Applications and Use Cases
The ESP-32 Cam finds applications in a wide range of domains, thanks to its versatility and performance. Some common use cases include:
Surveillance Systems:
The ESP-32 Cam can be used to build cost-effective and customizable surveillance systems for home security, monitoring, and more. With its compact size and wireless connectivity, it’s easy to deploy multiple cameras and access live feeds remotely
IoT Devices:
As part of the ESP-32 ecosystem, the ESP32 Cam can be integrated into IoT projects to add visual capabilities. From smart doorbells and environmental monitoring systems to smart agriculture and industrial automation, the possibilities are endless.
Robotics and Drones:
With its lightweight and compact design, the ESP-32 Cam is well-suited for use in robotics and drone applications. Whether for navigation, object detection, or aerial photography, the module provides a powerful platform for adding vision capabilities to autonomous systems.
Education and Learning:
The ESP-32 Cam serves as an excellent educational tool for learning about image processing, computer vision, and IoT concepts. Its affordable price and ease of use make it accessible to students and enthusiasts looking to explore the intersection of hardware and software.
Conclusion
In conclusion, the -Cam represents a powerful and versatile platform for integrating visual capabilities into a wide range of projects and applications. Whether you’re a hobbyist exploring the world of IoT, an educator teaching the next generation of innovators, or a professional building cutting-edge solutions, the ESP-32 Cam offers a wealth of opportunities for creativity and exploration. With its compact size, powerful features, and affordable price point, it’s no wonder that the ESP-32 Cam has become a favorite among developers worldwide. So why wait? Dive in and unleash your creativity with the ESP-32 Cam today!
What are the specifications of the esp32cam?
The ESP32 CAM module features an ESP32-S chip, an OV2640 camera sensor capable of capturing images up to 2 megapixels, supports video recording up to 1080p at 10 frames per second, has built-in Wi-Fi and Bluetooth connectivity, includes a microSD card slot for storage expansion, and offers GPIO pins for interfacing with external devices.
How to upload code to esp32-cam using Arduino IDE?
To upload code to an ESP32-CAM using the Arduino IDE, follow these steps:
Install the ESP32 Board Support Package:
If you haven’t already done so, you’ll need to install the ESP32 board support package in the Arduino IDE. Go to File > Preferences, and in the “Additional Board Manager URLs” field, add the following
URL: https://dl.espressif.com/dl/package_esp32_index.json.
Then, go to Tools > Board > Boards Manager, search for “ESP32”, and install the package.
Select the Correct Board and Port:
Connect your ESP32-CAM to your computer via USB. In the Arduino IDE, go to Tools > Board and select “AI Thinker ESP32-CAM”. Then, go to Tools > Port and select the port that corresponds to your ESP32-CAM.
Open Example Sketch:
To test uploading code, you can use one of the example sketches provided with the ESP32 board support package. Go to File > Examples > ESP32 > Camera, and select the example sketch that best fits your needs. For example, you might choose “CameraWebServer” to create a simple web server that streams video from the ESP32-CAM.
Modify the Code (Optional):
Depending on your project requirements, you may need to modify the example sketch to suit your needs. For example, you might want to change the Wi-Fi network credentials or adjust camera settings.
Upload the Code:
Once you’ve modified the code (if necessary), click the “Upload” button in the Arduino IDE toolbar. This will compile the sketch and upload it to your ESP32-CAM. Make sure your ESP32-CAM is in programming mode (press the “RST” button while holding down the “FLASH” button) before starting the upload process.
Monitor the Serial Output (Optional):
After uploading the code, you can open the Serial Monitor in the Arduino IDE (Tools > Serial Monitor) to view debug messages and monitor the behavior of your ESP32-CAM.
That’s it! You’ve successfully uploaded code to your ESP32-CAM using the Arduino IDE. You can now disconnect the ESP32-CAM from your computer and test its functionality according to the code you’ve uploaded.